X-13ARIMA-SEATS is a widely used software program for seasonal adjustment produced, distributed, and maintained by the U.S. Census Bureau. NumXL provides an intuitive interface with the program to help Excel users make forecasts and seasonal adjustments quickly and efficiently for economic and financial data. NumXL also offers users access to all raw files (input/output) that are generated in the process of data analysis.
This tutorial outlines the steps to launch the NumXL X13AS wizard and a brief description of its user interface and command controls.
1. Launch the Wizard
New model
Select an empty cell in your worksheet, preferably close from the input data set, and has a free adjacent cell (to store the model specifications).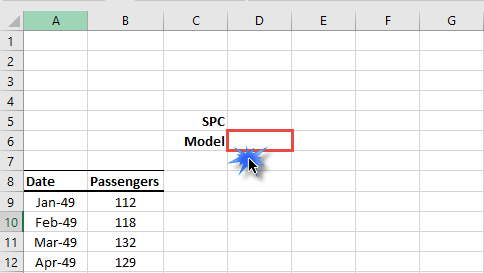
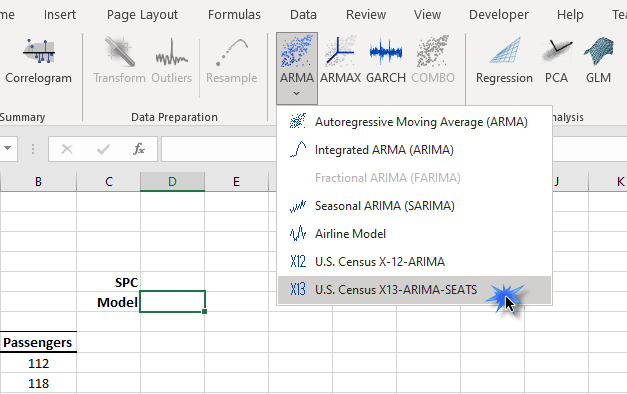
Next, from the NumXL toolbar, locate the ARMA icon, click on it, and select the X-13ARIMA-SEATS from the drop-down menu.
The X-13ARIMA-SEATS wizard pops up with x13as program default settings.
Existing model
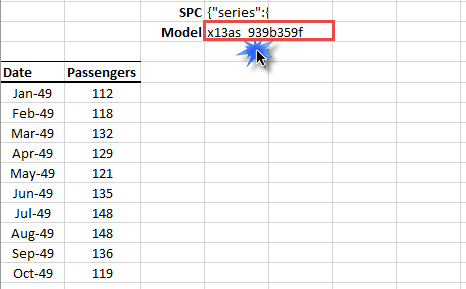
For an existing model, select the cell in your worksheet where you created the model previously. The cell has a text value that begins with "x13as_", and the cell formula starts with "=X13AS(".
Now, similar to what we did in the new model scenario: from the NumXL toolbar, locate the ARMA icon, click on it, and select the X-13ARIMA-SEATS from the drop-down menu.
The X13AS wizard pops up, with its fields initialized by the model's specification.
2. X-13ARIMA-SEATS Wizard
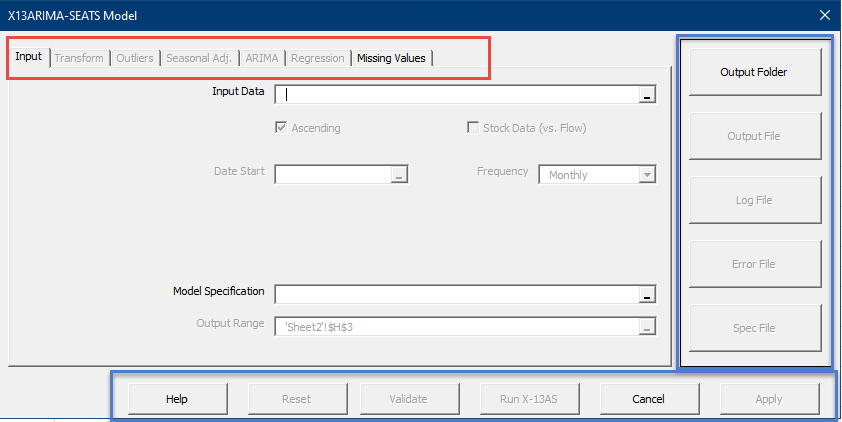
The NumXL X-13ARIMA-SEATS wizard consists of fields to set the model's specifications and many command buttons to assist you in building/validating your model interactively.
Dialog Tabs
We have grouped the related X13AS model's specifications in many tabs to assist you in incrementally building your model.
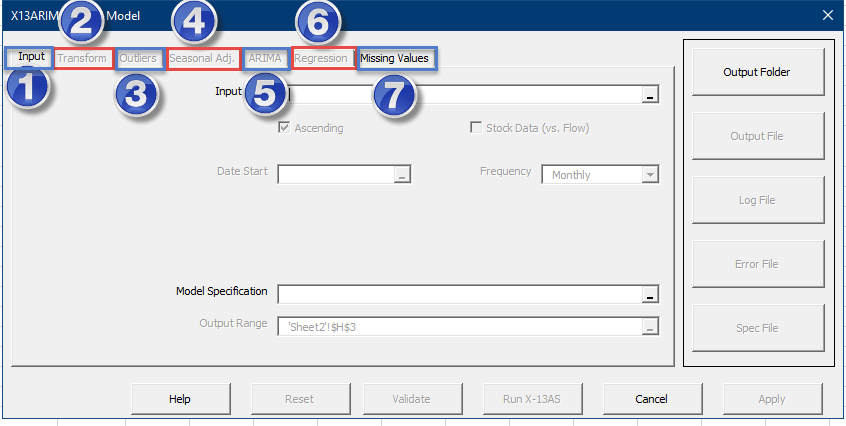
- Input – This is where you describe the input data set. For instance, the cell range of your input data set, start date, and specify the sampling frequency (e.g., monthly, quarterly).
- Transform – In this tab, you can instruct the x13as program to perform a prior adjustment for your data, such as transforming its values using some function or performing some calendar adjustment outside the RegARIMA model.
- Outliers – In this tab, you can fine-tune the outliers' auto-detection algorithm, such as outliers type and statistical thresholds values.
- Seasonal adjust. – The seasonal adjustment tab includes several parameters to select the desired seasonal adjustment methodology (e.g., SEATS, X11) and its related parameters. You can turn off the seasonal adjustment functionality here, as well.
- ARIMA – In this tab, you may select the model's auto-detection methodology (e.g., TRAMo, X11-ARIMA/88, Manual) and its related settings.
- Regression – You can choose to include a set of predefined exogenous factors to the ARIMA model; regressor includes holidays, date/calendar adjustment, and outliers.
- Missing values – In this tab, you may elect treatment for intermediate observations with missing values. Note, the missing values at either end of the data set are left intact.
Command Buttons
The X13AS wizard comes with several command buttons that interact with the underlying US census x13as program to validate your model's settings and examine various output files in an isolated environment.
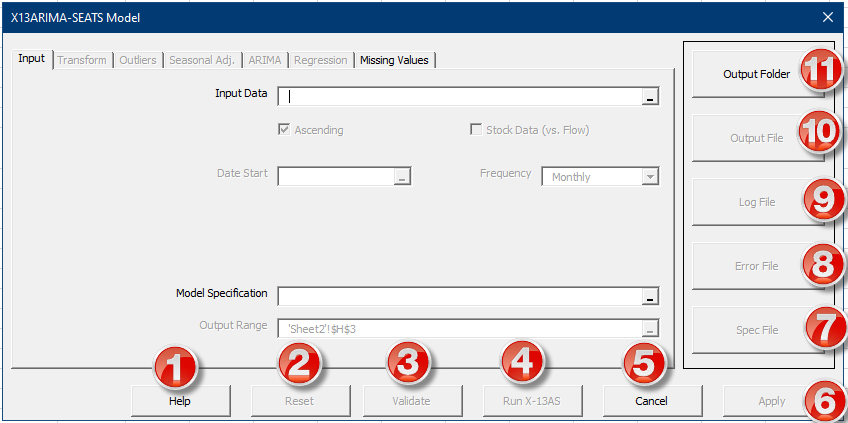
- Help – By pressing the "Help" button, NumXL launches the web browser and opens the user's guide pages in our support portal.
- Reset – When you launch the X13AS wizard, NumXL creates a sandbox initialized with your model settings, so you can experiment with different settings without affecting the original model until you are ready. The Reset button removes your changes and restores the sandbox to its initial state when you first open it.
- Validate – We designed the X13AS wizard to help you select a consistent set of settings, but you still need to validate with the underlying x13as program. When you press the "Validate" button, NumXL runs the x13as program in our sandbox to validate the model. If x13as finds any issue, a dialog box pops up with a description of the matter found. Otherwise, both the "Run X13AS" and the "Apply" buttons are enabled.
- Run X13AS – this command runs the underlying US census x13as program in full mode and generates various output files for your review. Upon completion, a dialog with a status message pops up.
- Cancel – the cancel button closes the dialog box, and no changes are committed to the spreadsheet.
- Apply – this command button closes the dialog box as well, but after it updates the formula of the model's cell and the specification text of the SPC cells in your workbook.
- Spec File – by pressing the "Spec File" button, NumXL launches the notepad application and opens the x13as specification file for your model in the sandbox. NumXL only commits your model settings that are different from the program defaults.
- Error file – this command button launches the notepad application and opens the error file generated by the underlying US census x13as program. This file contains error messages, warnings, and notes.
- Log file - this command button launches the notepad application and opens the log file generated by the underlying US census x13as program.
- Output file – NumXL launches the notepad application and opens the underlying x13as program output file. The output file has much critical information related to your data, model detection, anomalies, and more.
- Output Folder – NumXL opens windows explorer into the "sandbox" folder in the user's local profile. In this folder, you can view/examine all generated output files.
Comments
Please sign in to leave a comment.